자동화 작업에 웹훅 URL을 추가하면, 정의한 규칙이 새로운 실행과 일치할 때마다 웹훅 엔드포인트로 POST 요청을 전송합니다.
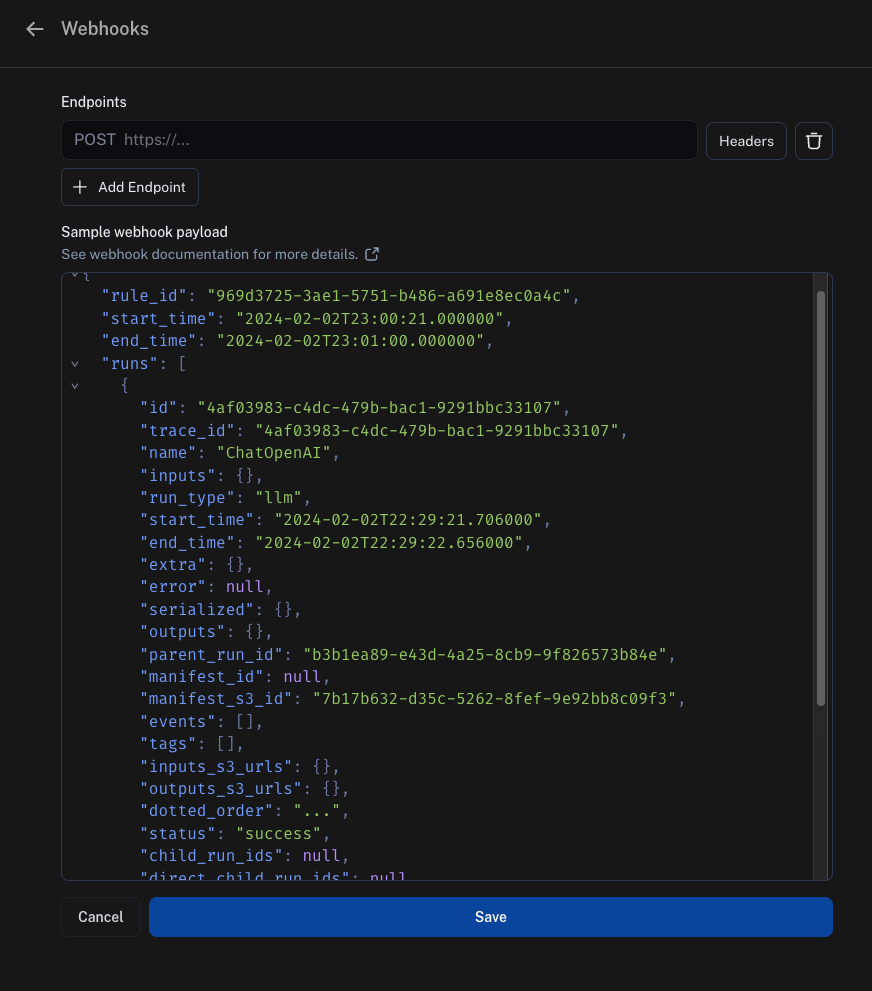
웹훅 페이로드
웹훅 엔드포인트로 전송되는 페이로드에는 다음이 포함됩니다:
"rule_id": 이 페이로드를 전송한 자동화의 ID입니다"start_time" 및 "end_time": 일치하는 실행을 발견한 시간 범위입니다"runs": 실행의 배열이며, 각 실행은 딕셔너리입니다. 각 실행에 대한 추가 정보가 필요한 경우 엔드포인트에서 SDK를 사용하여 API에서 가져오는 것을 권장합니다."feedback_stats": 실행에 대한 피드백 통계가 포함된 딕셔너리입니다. 이 필드에 대한 예시 페이로드는 아래에 나와 있습니다.
"feedback_stats": {
    "about_langchain": {
        "n": 1,
        "avg": 0.0,
        "show_feedback_arrow": true,
        "values": {}
    },
    "category": {
        "n": 0,
        "avg": null,
        "show_feedback_arrow": true,
        "values": {
            "CONCEPTUAL": 1
        }
    },
    "user_score": {
        "n": 2,
        "avg": 0.0,
        "show_feedback_arrow": false,
        "values": {}
    },
    "vagueness": {
        "n": 1,
        "avg": 0.0,
        "show_feedback_arrow": true,
        "values": {}
    }
}
S3 URL에서 가져오기실행이 얼마나 최근인지에 따라 inputs_s3_urls 및 outputs_s3_urls 필드에 실제 데이터 대신 S3 URL이 포함될 수 있습니다.inputs 및 outputs는 각각 inputs_s3_urls 및 outputs_s3_urls에 제공된 ROOT.presigned_url을 통해 가져올 수 있습니다.
{
  "rule_id": "d75d7417-0c57-4655-88fe-1db3cda3a47a",
  "start_time": "2024-04-05T01:28:54.734491+00:00",
  "end_time": "2024-04-05T01:28:56.492563+00:00",
  "runs": [
    {
      "status": "success",
      "is_root": true,
      "trace_id": "6ab80f10-d79c-4fa2-b441-922ed6feb630",
      "dotted_order": "20230505T051324571809Z6ab80f10-d79c-4fa2-b441-922ed6feb630",
      "run_type": "tool",
      "modified_at": "2024-04-05T01:28:54.145062",
      "tenant_id": "2ebda79f-2946-4491-a9ad-d642f49e0815",
      "end_time": "2024-04-05T01:28:54.085649",
      "name": "Search",
      "start_time": "2024-04-05T01:28:54.085646",
      "id": "6ab80f10-d79c-4fa2-b441-922ed6feb630",
      "session_id": "6a3be6a2-9a8c-4fc8-b4c6-a8983b286cc5",
      "parent_run_ids": [],
      "child_run_ids": null,
      "direct_child_run_ids": null,
      "total_tokens": 0,
      "completion_tokens": 0,
      "prompt_tokens": 0,
      "total_cost": null,
      "completion_cost": null,
      "prompt_cost": null,
      "first_token_time": null,
      "app_path": "/o/2ebda79f-2946-4491-a9ad-d642f49e0815/projects/p/6a3be6a2-9a8c-4fc8-b4c6-a8983b286cc5/r/6ab80f10-d79c-4fa2-b441-922ed6feb630?trace_id=6ab80f10-d79c-4fa2-b441-922ed6feb630&start_time=2023-05-05T05:13:24.571809",
      "in_dataset": false,
      "last_queued_at": null,
      "inputs": null,
      "inputs_s3_urls": null,
      "outputs": null,
      "outputs_s3_urls": null,
      "extra": null,
      "events": null,
      "feedback_stats": null,
      "serialized": null,
      "share_token": null
    }
  ]
}
https://api.example.com/langsmith_webhook?secret=38ee77617c3a489ab6e871fbeb2ec87d
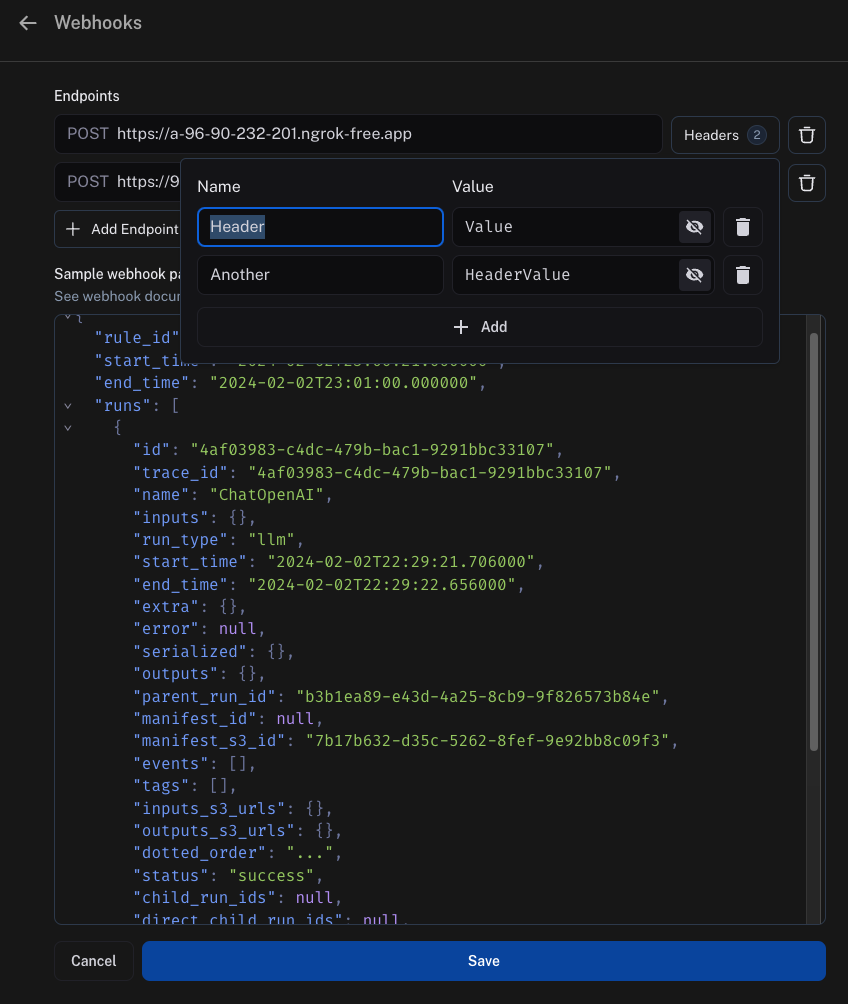
웹훅 사용자 지정 HTTP 헤더
웹훅과 함께 특정 헤더를 전송하려는 경우 URL별로 구성할 수 있습니다. 이를 설정하려면 URL 필드 옆에 있는 Headers 옵션을 클릭하고 헤더를 추가하세요.
웹훅 전달
웹훅 엔드포인트로 이벤트를 전달할 때 다음 지침을 따릅니다:
- 엔드포인트 연결에 실패하면 전달 실패를 선언하기 전에 전송 연결을 최대 2회까지 재시도합니다.
- 엔드포인트가 응답하는 데 5초 이상 걸리면 전달 실패를 선언하고 재시도하지 않습니다.
- 엔드포인트가 5초 이내에 5xx 상태 코드를 반환하면 지수 백오프를 사용하여 최대 2회까지 재시도합니다.
- 엔드포인트가 4xx 상태 코드를 반환하면 전달 실패를 선언하고 재시도하지 않습니다.
- 엔드포인트가 본문에 반환하는 모든 내용은 무시됩니다
Modal을 사용한 예시
이를 설정하는 방법에 대한 예시로 Modal을 사용하겠습니다. Modal은 추론 및 파인튜닝을 위한 자동 스케일링 GPU, 코드 에이전트를 위한 안전한 컨테이너화, 서버리스 Python 웹 엔드포인트를 제공합니다. 여기서는 웹 엔드포인트에 중점을 둡니다.
먼저 Modal 계정을 생성합니다. 그런 다음 로컬에 Modal SDK를 설치합니다:
계정 설정을 완료하려면 다음 명령을 실행합니다:
그리고 지침을 따릅니다
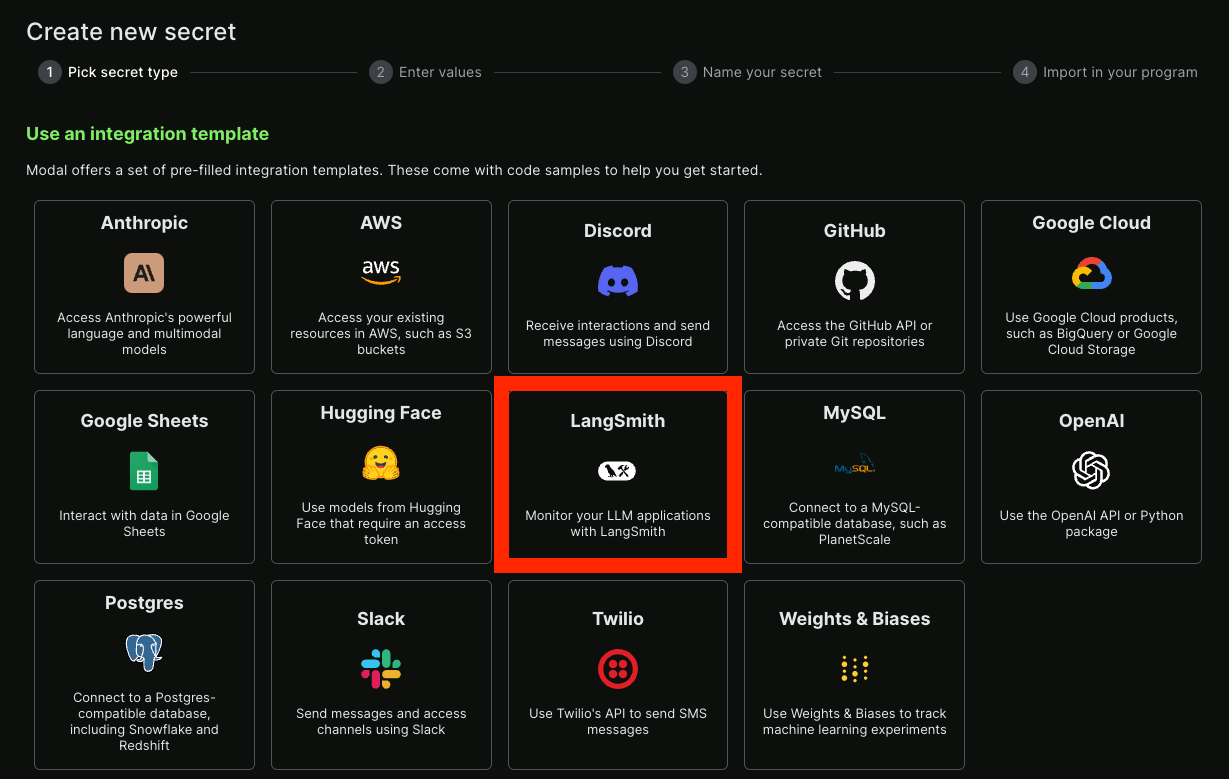
시크릿
다음으로 Modal에서 몇 가지 시크릿을 설정해야 합니다.
먼저 LangSmith는 시크릿을 전달하여 Modal에 인증해야 합니다.
가장 쉬운 방법은 쿼리 매개변수에 시크릿을 전달하는 것입니다.
이 시크릿을 검증하려면 _Modal_에 시크릿을 추가하여 검증해야 합니다.
Modal 시크릿을 생성하여 이를 수행합니다.
시크릿에 대한 지침은 여기에서 확인할 수 있습니다.
이를 위해 시크릿을 ls-webhook이라고 부르고 LS_WEBHOOK이라는 이름의 환경 변수를 설정하도록 하겠습니다.
LangSmith 시크릿도 설정할 수 있습니다. 다행히 이를 위한 통합 템플릿이 이미 있습니다!
서비스
그 후 엔드포인트 역할을 할 Python 파일을 생성할 수 있습니다.
다음은 진행 과정을 설명하는 주석과 함께 예시입니다:
from fastapi import HTTPException, status, Request, Query
from modal import Secret, Stub, web_endpoint, Image

stub = Stub("auth-example", image=Image.debian_slim().pip_install("langsmith"))


@stub.function(
    secrets=[Secret.from_name("ls-webhook"), Secret.from_name("my-langsmith-secret")]
)
# We want this to be a `POST` endpoint since we will post data here
@web_endpoint(method="POST")
# We set up a `secret` query parameter
def f(data: dict, secret: str = Query(...)):
    # You can import dependencies you don't have locally inside Modal functions
    from langsmith import Client

    # First, we validate the secret key we pass
    import os

    if secret != os.environ["LS_WEBHOOK"]:
        raise HTTPException(
            status_code=status.HTTP_401_UNAUTHORIZED,
            detail="Incorrect bearer token",
            headers={"WWW-Authenticate": "Bearer"},
        )

    # This is where we put the logic for what should happen inside this webhook
    ls_client = Client()
    runs = data["runs"]
    ids = [r["id"] for r in runs]
    feedback = list(ls_client.list_feedback(run_ids=ids))
    for r, f in zip(runs, feedback):
        try:
            ls_client.create_example(
                inputs=r["inputs"],
                outputs={"output": f.correction},
                dataset_name="classifier-github-issues",
            )
        except Exception:
            raise ValueError(f"{r} and {f}")
    # Function body
    return "success!"
modal deploy ...를 사용하여 쉽게 배포할 수 있습니다 (문서는 여기 참조).
다음과 같은 결과가 나타납니다:
✓ Created objects.
├── 🔨 Created mount /Users/harrisonchase/workplace/langsmith-docs/example-webhook.py
├── 🔨 Created mount PythonPackage:langsmith
└── 🔨 Created f => https://hwchase17--auth-example-f.modal.run
✓ App deployed! 🎉

View Deployment: https://modal.com/apps/hwchase17/auth-example
https://hwchase17--auth-example-f.modal.run입니다. 이것이 우리가 실행하기 위해 생성한 함수입니다.
참고: 이것은 최종 배포 URL이 아니므로 실수로 사용하지 않도록 주의하세요.
연결하기
이제 위에서 생성한 함수 URL을 가져와서 웹훅으로 추가할 수 있습니다.
비밀 키를 쿼리 매개변수로 전달하는 것도 기억해야 합니다.
모두 합치면 다음과 같이 보입니다:
https://hwchase17--auth-example-f-dev.modal.run?secret={SECRET}
{SECRET}을 Modal 서비스에 액세스하기 위해 생성한 비밀 키로 바꾸세요.

